Loading NSW DPI State Forest Hunting Maps Onto A Garmin Fenix Watch
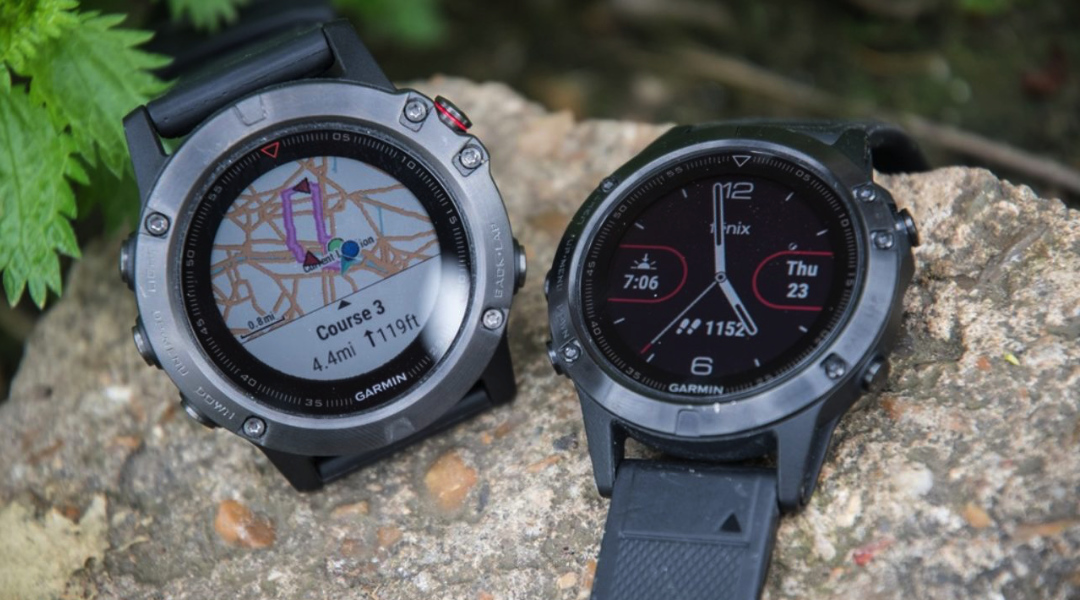
This guide will allow you to fully load the NSW DPI exclusion zone maps onto your Garmin Fenix Watch. I have only tested this on the Garmin Fenix 6 Sapphire but it will likely work on a variety Garmin watch models that support mapping including some of the Fenix and Forerunner models.
The process is very simple for PC users and slightly more complex for Mac users but both are very easy and I will cover both so nobody is left out.
Downloading The Maps
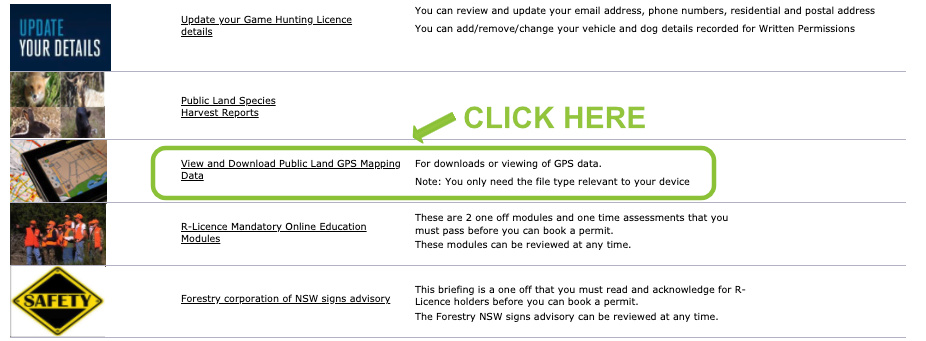
Step One - Head to the DPI website.
Click the website link and enter your login details. Then go down the page and click “View and Download Public Land GPS Mapping Data”
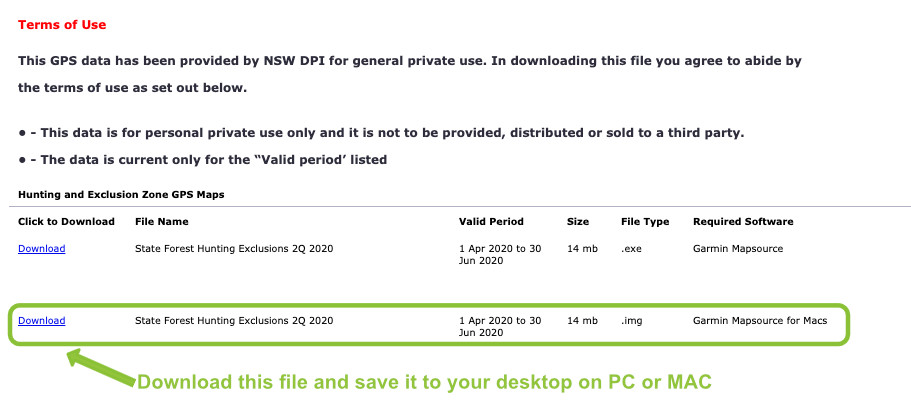
Step 2 - Download The Map File
Download the state forest hunting exclusions file with the file type “.img” Both Windows and Mac users should download this same file. (Don’t bother with any other file types such as “.exe” or “.kmz”)
Installing the Maps From an Apple Mac Computer
Step 1 - Download the “Android File Transfer” app and install it on your computer
The Garmin Fenix watch uses a version of Android so you will need this app to access the watch and install the map file. Click the link above and then download and install the app.
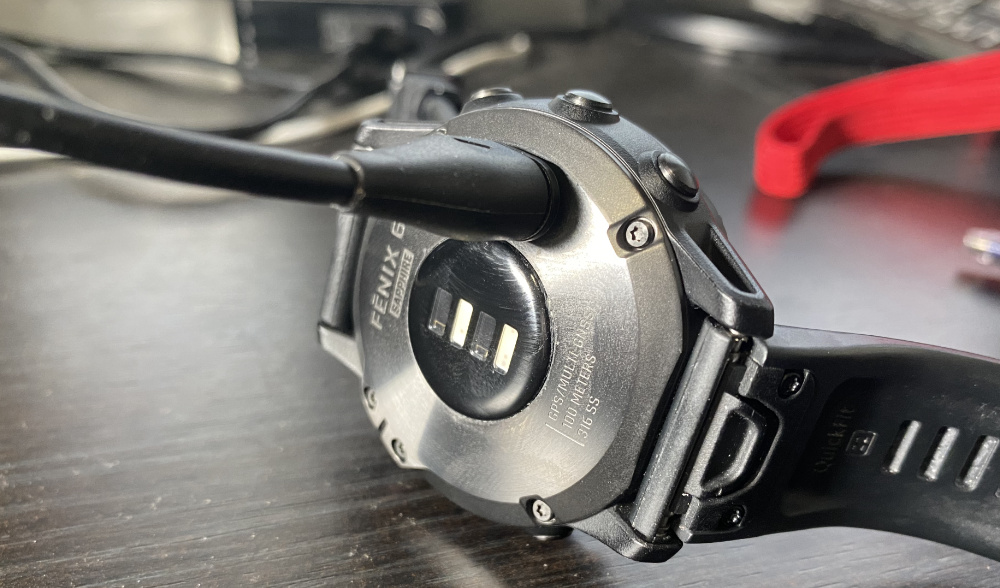
Step 2 - Plug your Garmin watch into your computer using the USB cable.
Step 3 - Open the Android File Transfer App
Once you have downloaded and installed it make sure all other Garmin apps on your computer are shut down and open up the Android File Transfer App.
![]()
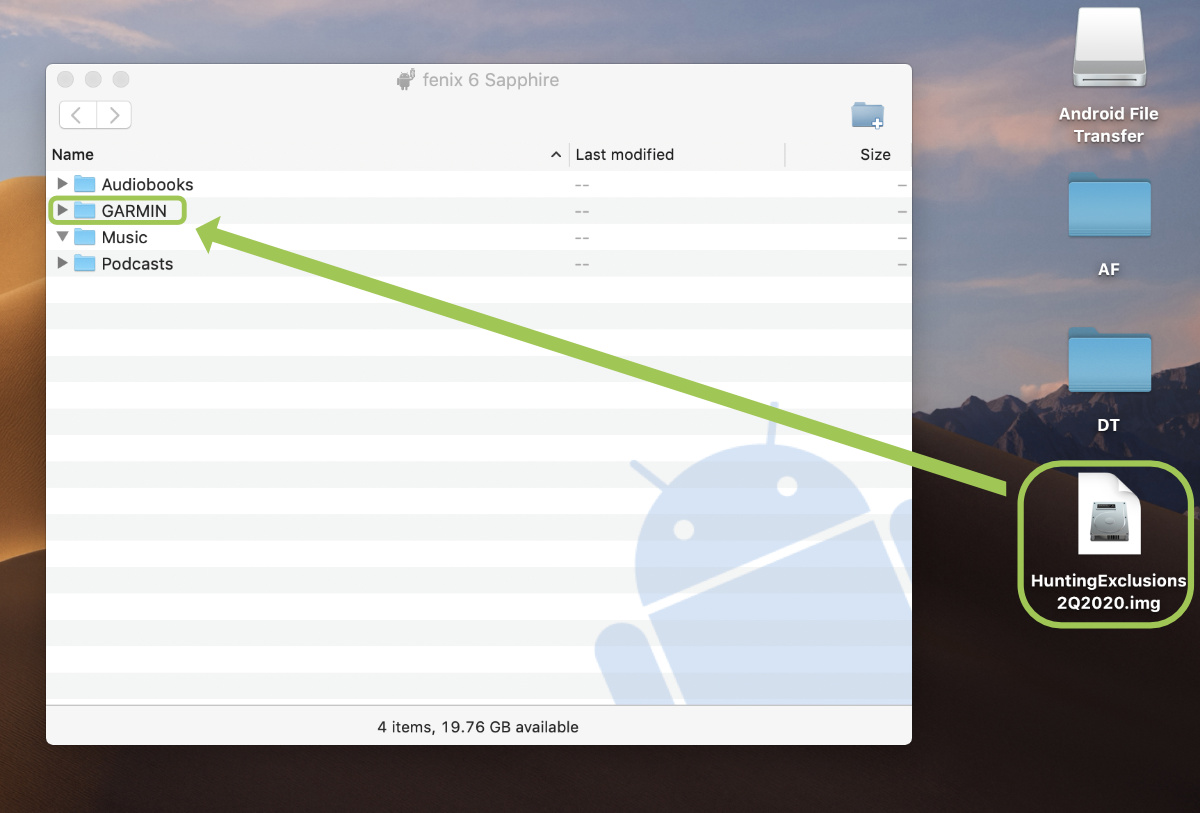
Step 4 - Move The File Onto The Garmin Watch
Drag the DPI exclusion zone map file into the “Garmin” folder on your watch. (Put it directly into the folder called “Garmin” and not any of the sub-folders)
Step 5 - Unplug The Watch
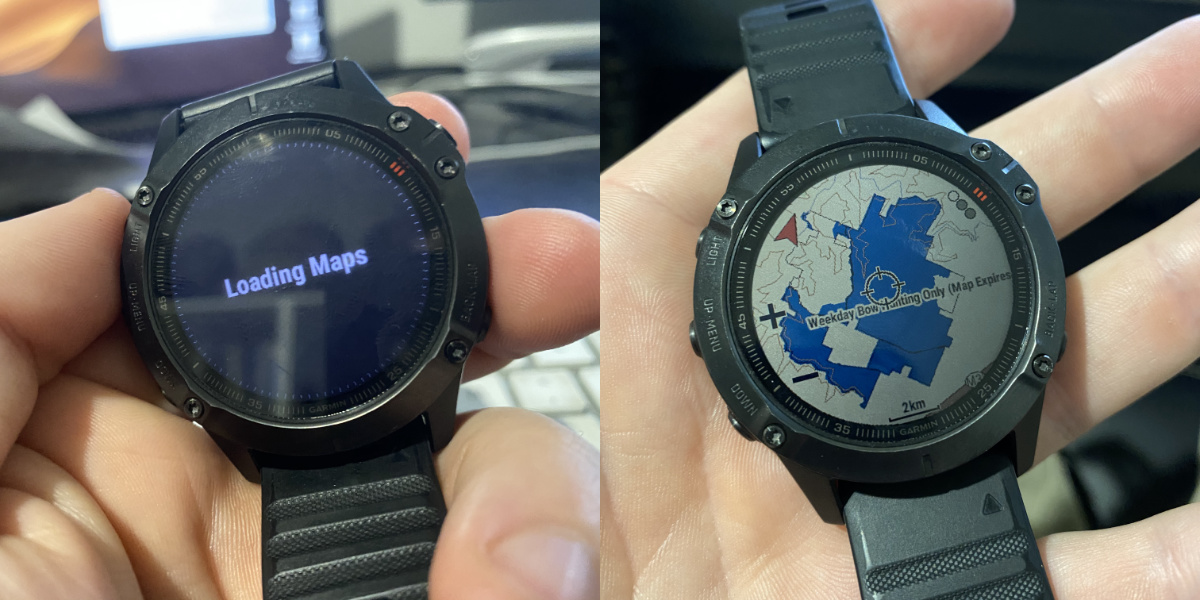
Wait until the file transfer is complete and then you can unplug your watch from the USB port. After a few seconds the watch should go from USB mode to normal mode and then it should say “Loading Maps” on the screen.
After this text is gone from the screen then you have successfully installed the maps onto your watch and they will automatically appear when you open the Garmin Maps app on the watch.
Installing the Maps From A Windows Computer
Windows should be able to connect directly to the Garmin watch so there should be no need to download another app like we needed to on the Mac. Sorry I don’t have the screenshots for Windows as I use a Mac but is a very simple process and should be easy enough.
Step 1 - Plug your Garmin watch into the computer using the USB cable.
This should put your watch into USB mode and it should show up as a drive on your computer.
Step 2 - Move The File Onto The Watch
Drag the DPI Exclusion Zone .img File from your desktop into the “Garmin” folder on your watch. (Make sure it is directly into the folder called “Garmin” and not one of the sub-folders)
Step 3 - Unplug The Watch
Wait until the file transfer is complete and then you can eject & unplug your watch from the USB port. After a few seconds the watch should go from USB mode to normal mode and then it should say “Loading Maps” on the screen.
After this text is gone from the screen then you have successfully installed the maps onto your watch and they will automatically appear when you open the Garmin Maps app on the watch.